Disable Lock Screen in Windows 10 to Access Your Desktop Faster
Having both a lock screen and a login screen is a clumsy implementation of the sign-in process in Windows 10. So in this article, we will tell you how to disable the lock screen to make your Windows 10 login experience more seamless. We will show you two ways to disable the Windows 10 lock screen. Firstly, using Windows Registry and secondly, using Group Policy. So without any further delay, let’s get started.
Disable Windows 10 Lock Screen Using Registry
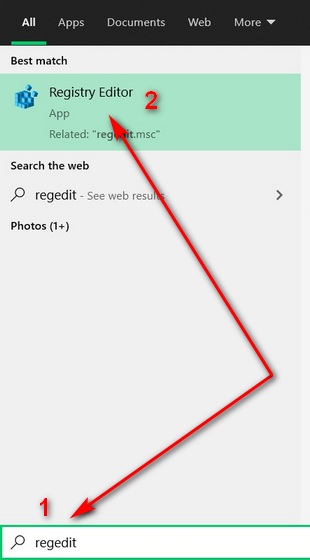
Firstly, open the Windows Registry Editor. To do that, search for ‘regedit’ in the Windows Search Bar and click on the first result.
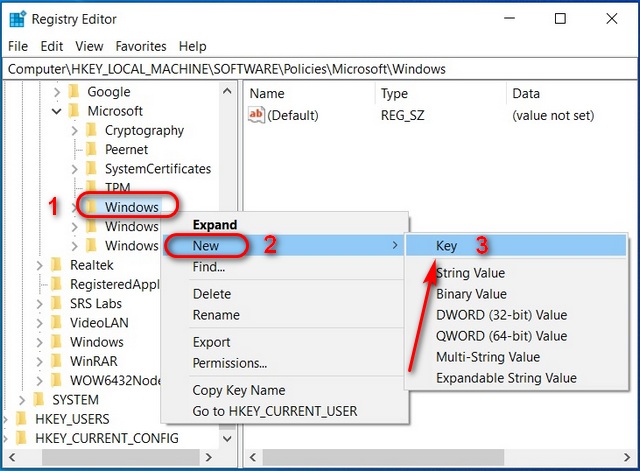
In the Registry Editor window, use the left sidebar to navigate to the following key:HKEY_LOCAL_MACHINE\SOFTWARE\Policies\Microsoft\Windows. Now right-click on the Windows folder and select New -> Key.
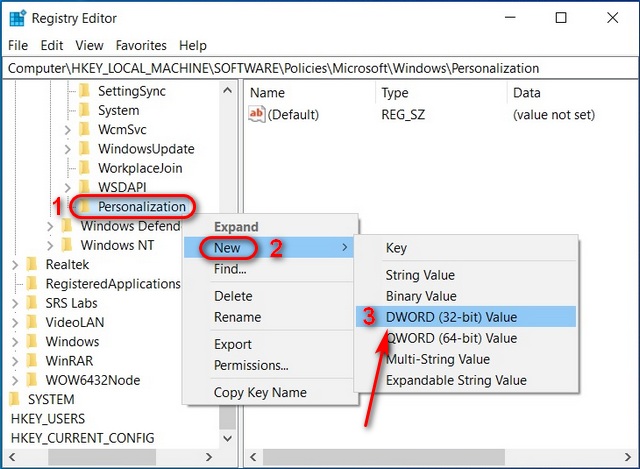
Name the new key ‘Personalization’ and hit Enter. Now right-click on the new Personalization key and select New -> DWORD (32-bit) Value.
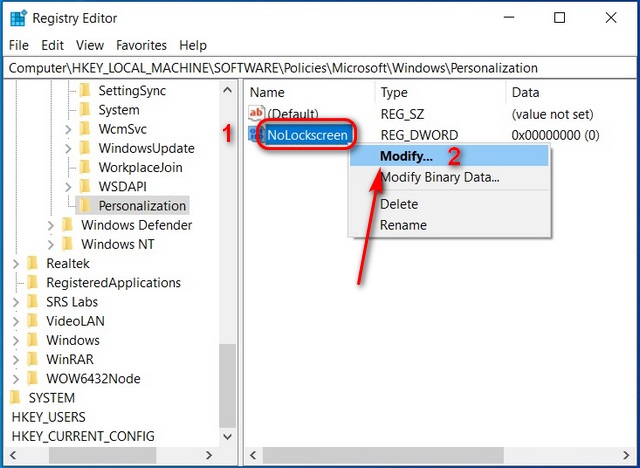
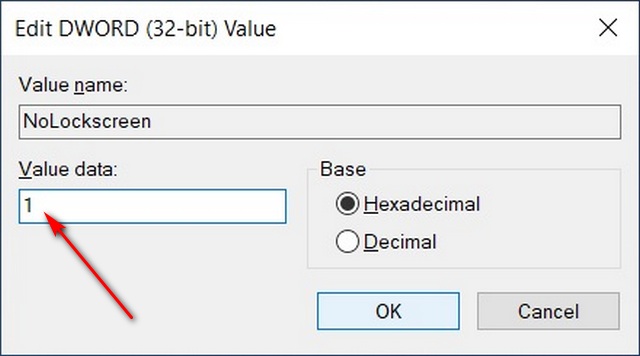
Name this key ‘NoLockscreen‘ and press Enter. Then, right-click on NoLockscreen and select ‘Modify‘ to change its value.
In the pop-up window, type “1” in the hexadecimal ‘Value data’ field (0=lock screen enabled, 1=lock screen disabled). Finally, click on ‘OK‘ or hit Enter.
Restart your Windows 10 computer, and you should no longer see the lock screen while signing in. To re-enable the lock screen at any time, change the DWORD value to “0” by following the steps above.
Disable Windows 10 Lock Screen Using Group Policy
Group Policy Editor is not available in Windows 10 Home, but you can enable it easily by following our step-by-step guide. Once you have done that, follow these steps to disable the lock screen in Windows 10 using Group Policy:
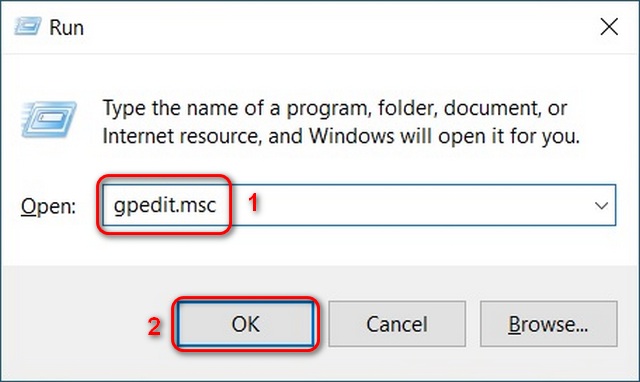
Hit Windows key + R simultaneously to open the Run dialog box (You can also search for ‘Run’ in the Windows Search Bar). Now type ‘gpedit.msc’ and hit Enter.
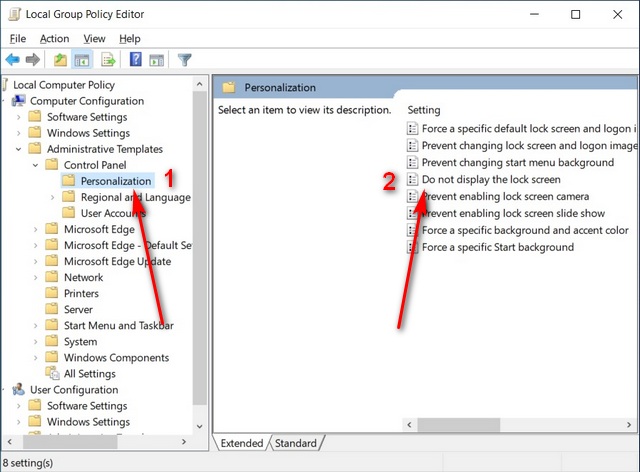
In the Group Policy Editor window, navigate to the following path using the left sidebar: Computer Configuration -> Administrative Templates -> Control Panel -> Personalization. Then in the right pane, double-click on the entry that says ‘Do not display the lock screen‘.
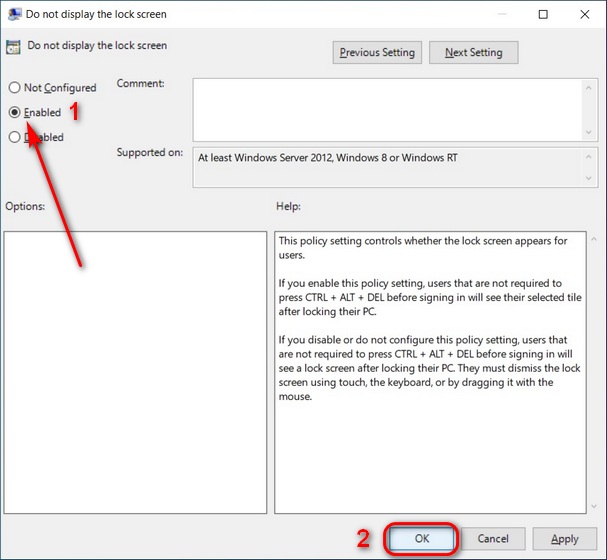
In the pop-up window, select ‘Enabled’ and click on ‘OK‘ to turn off the lock screen in Windows 10.
Once you restart your computer, you will no longer have to deal with the Windows 10 lock screen. Just enter your password and get to work right away.
Make Windows 10 Login Experience Seamless With This Neat Little Trick
The lock screen shows the date, time, weather, and app notifications, all of which you can access from your desktop anyways. What’s more, Microsoft can also add the lock screen info to the login screen if it so desperately wants to show us all those details before we even sign in. As it stands, the current approach is both clumsy and unnecessary. So go ahead, disable the lock screen in your Windows 10 PC and let us know how that went. As for some of the other annoyances on Windows 10, you can disable notifications and remove all ads from your PC. You can also disable the touchscreen on your PC if you don’t think it adds much value. Finally, to bolster your privacy, you can disable location tracking on Windows 10 and configure your browsers to fake your geo-location.
